Managing General Settings
To manage your Organization’s general settings:1
Sign in to the Pagos Service Panel.
2
Click the settings icon in the top-right corner of the Pagos Service Panel, then click Settings under your Organization’s name. This opens a pop-up with your Organization’s information.
3
In the General page, click Update Profile to add or change your Organization name and logo.
4
Click Add domain to add a verified domain to your Organization.
Adding a Verified Domain
If your business has a verified domain, you can add it to your Pagos Organization. To add a verified domain:1
Click the settings icon in the top-right corner of the Pagos Service Panel, then click Settings under your Organization’s name.
2
In the Verified domains section of the General page, click Add domain.
3
Enter your domain, then click Save.
4
Enter your email address at that domain, then click Save. You’ll receive an email to verify the domain for your Pagos Organization.
User Enrollment with Verified Domains
After you set up a verified domain, turn on Automatic Suggestions to make it easier for users with email addresses on that domain to join your Pagos Organization. To turn this on, click the … icon beside your verified domain, then click Manage.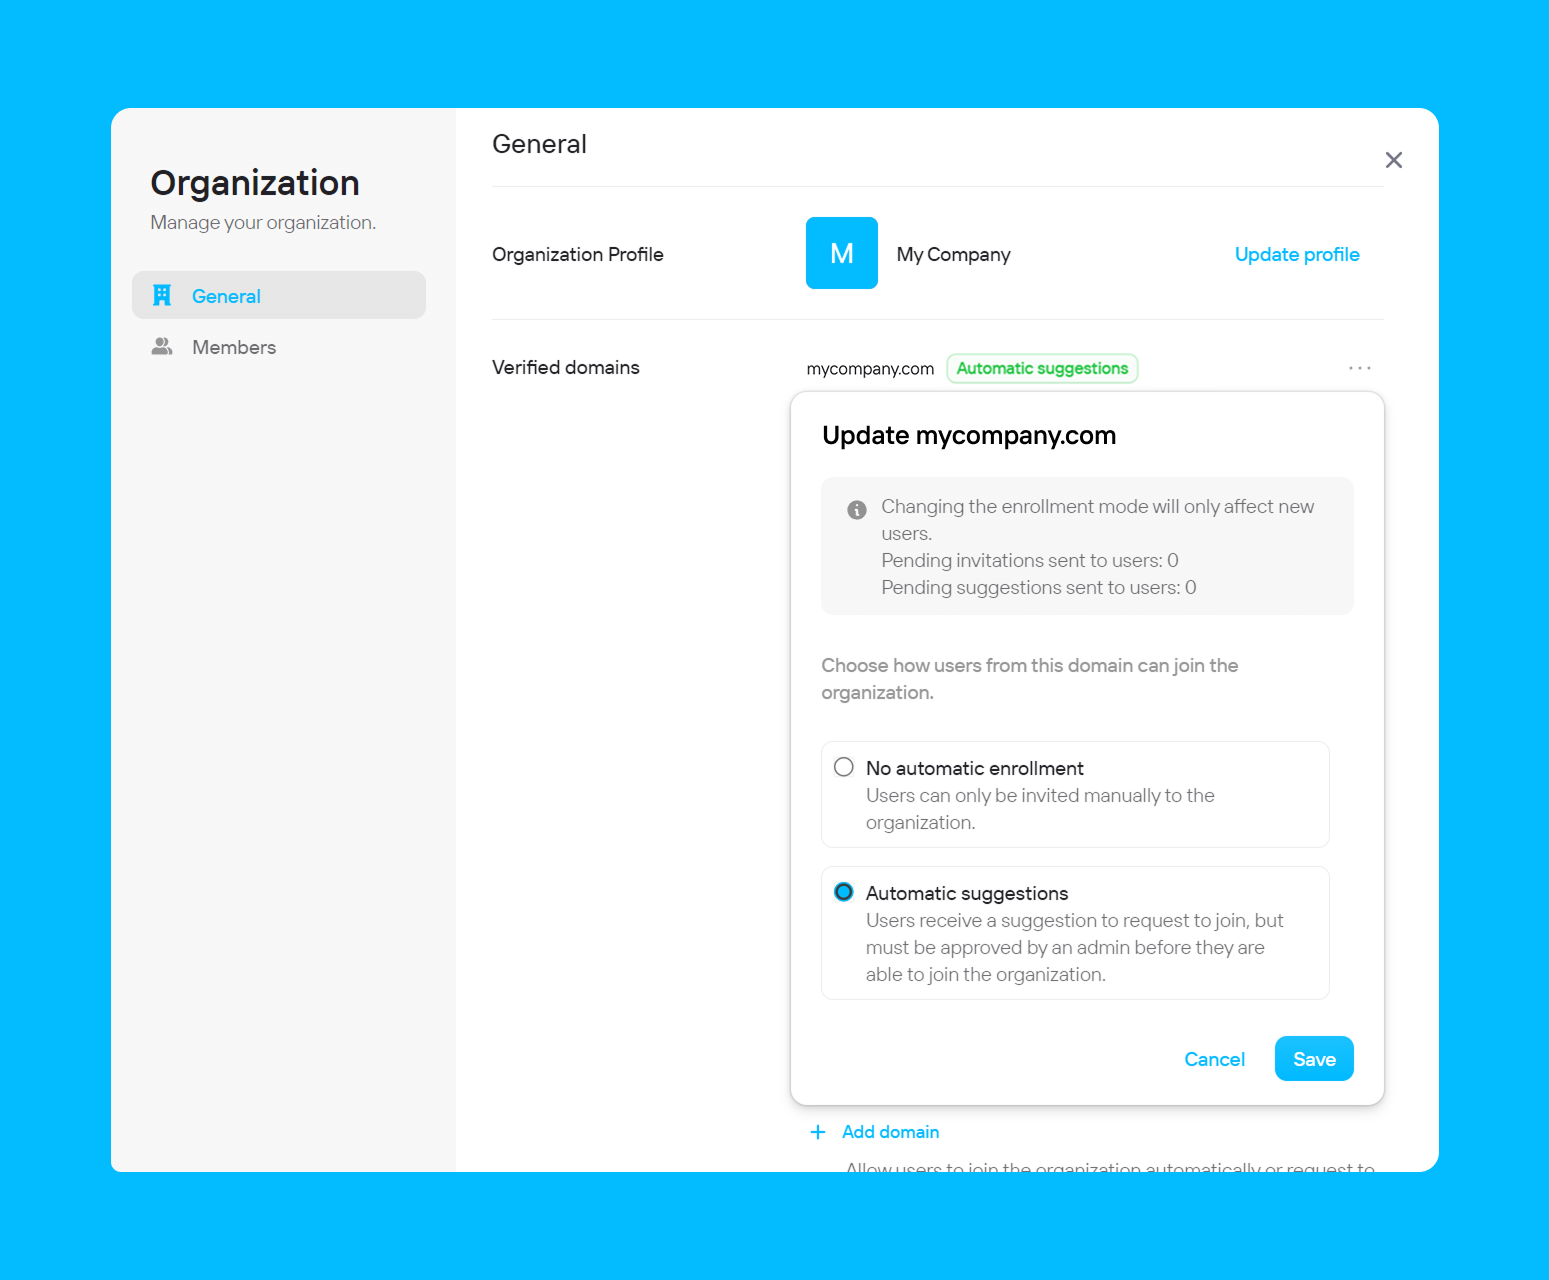
- No automatic enrollment - Regardless of the user’s email address domain, they can only join your Pagos Organization via an email invitation.
- Automatic suggestions - When a user with an email address on your verified domain manually signs up for a Pagos account, they’ll have the option to join your Organization automatically. See our New User Onboarding Guide for details on how this looks for a new user on your verified domain. An Admin in your organization will manage requests to join your Organization.
Managing Organization Members
You can manage which Pagos users have access to your Organization within the Members page of your Organization settings. To navigate directly to this page, click Team under your company name in the main settings menu. The Members tab displays a list of Pagos users in your Organization and their role (Member or Admin). Each user has their own Pagos account with unique login credentials.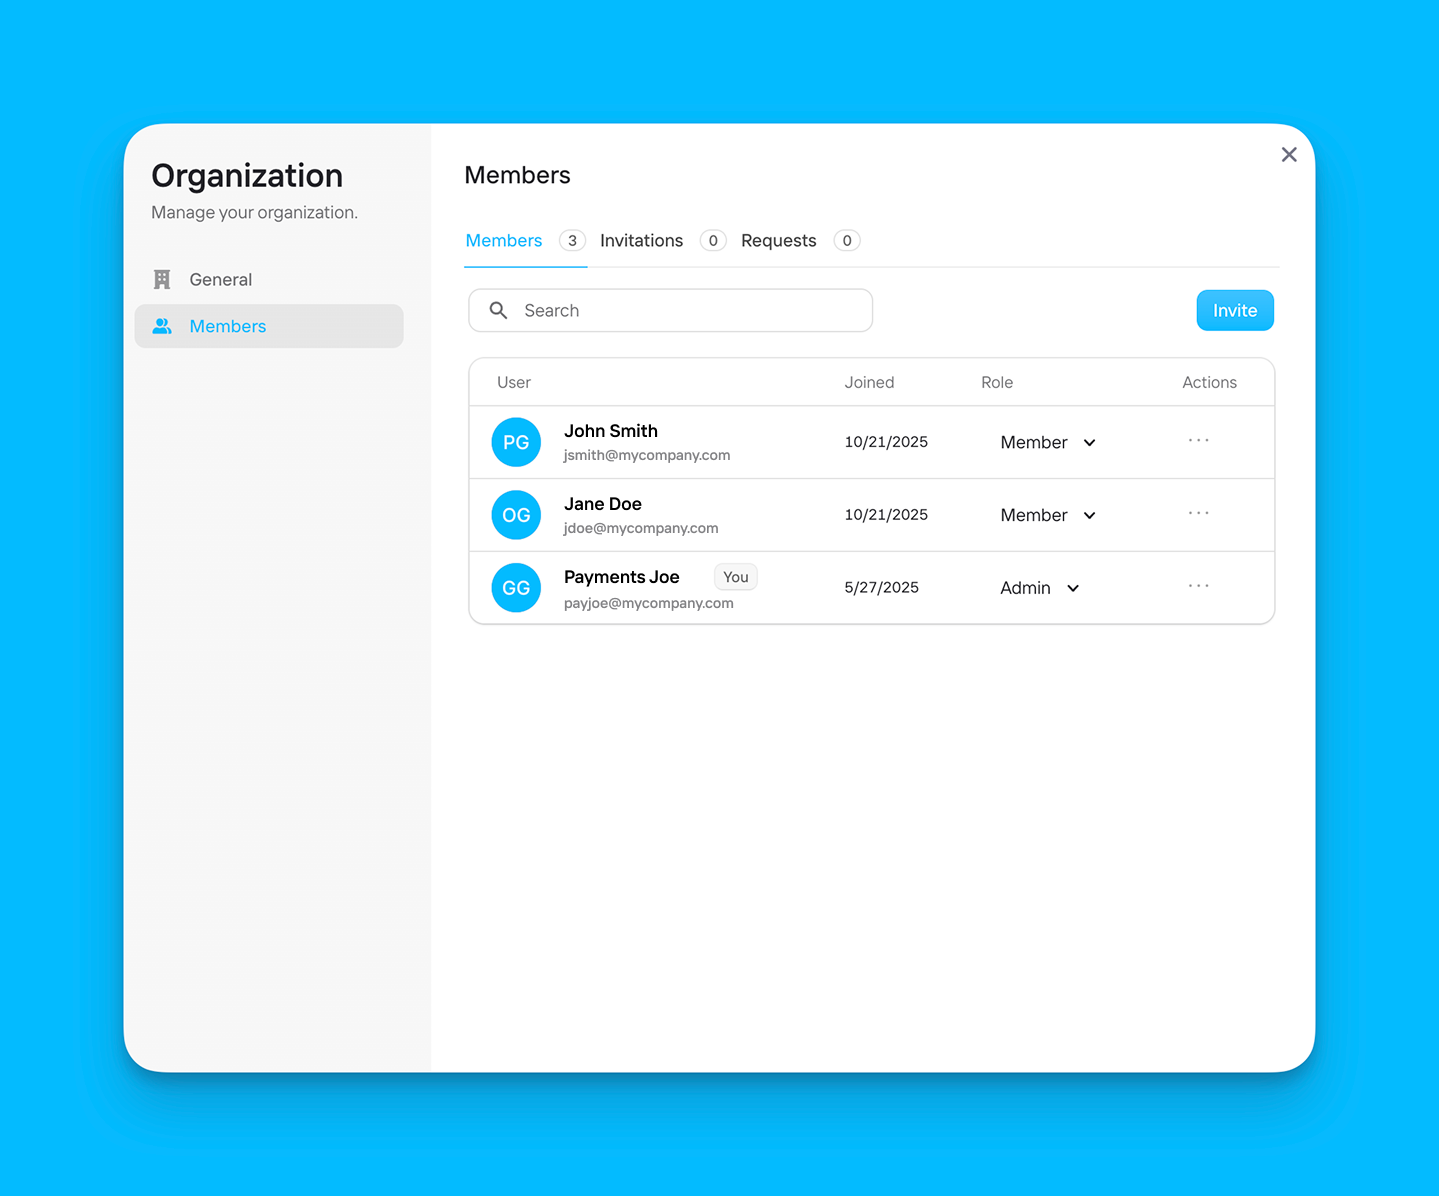
Inviting New Members
To invite new users to join the organization:1
In the Members or Invitations tabs of the Members page, click Invite
2
Enter the user's email address
You can invite multiple members by adding each email address, separated by spaces or commas.
3
Set user roles
Use the Role drop-down menu to assign a role to the user(s):
- Members can access the Pagos Service Panel
- Admins can access the Pagos Service Panel, edit data connections, make changes to the Organization’s settings, and manage members
4
Click Send invitations