> ## Documentation Index
> Fetch the complete documentation index at: https://docs.pagos.ai/llms.txt
> Use this file to discover all available pages before exploring further.
# Managing Data Connections
> Manage the accounts you connect to Pagos for payments data importing. See our **Connecting Your PSPs** guides for the step-by-step setup instructions specific to each processor.
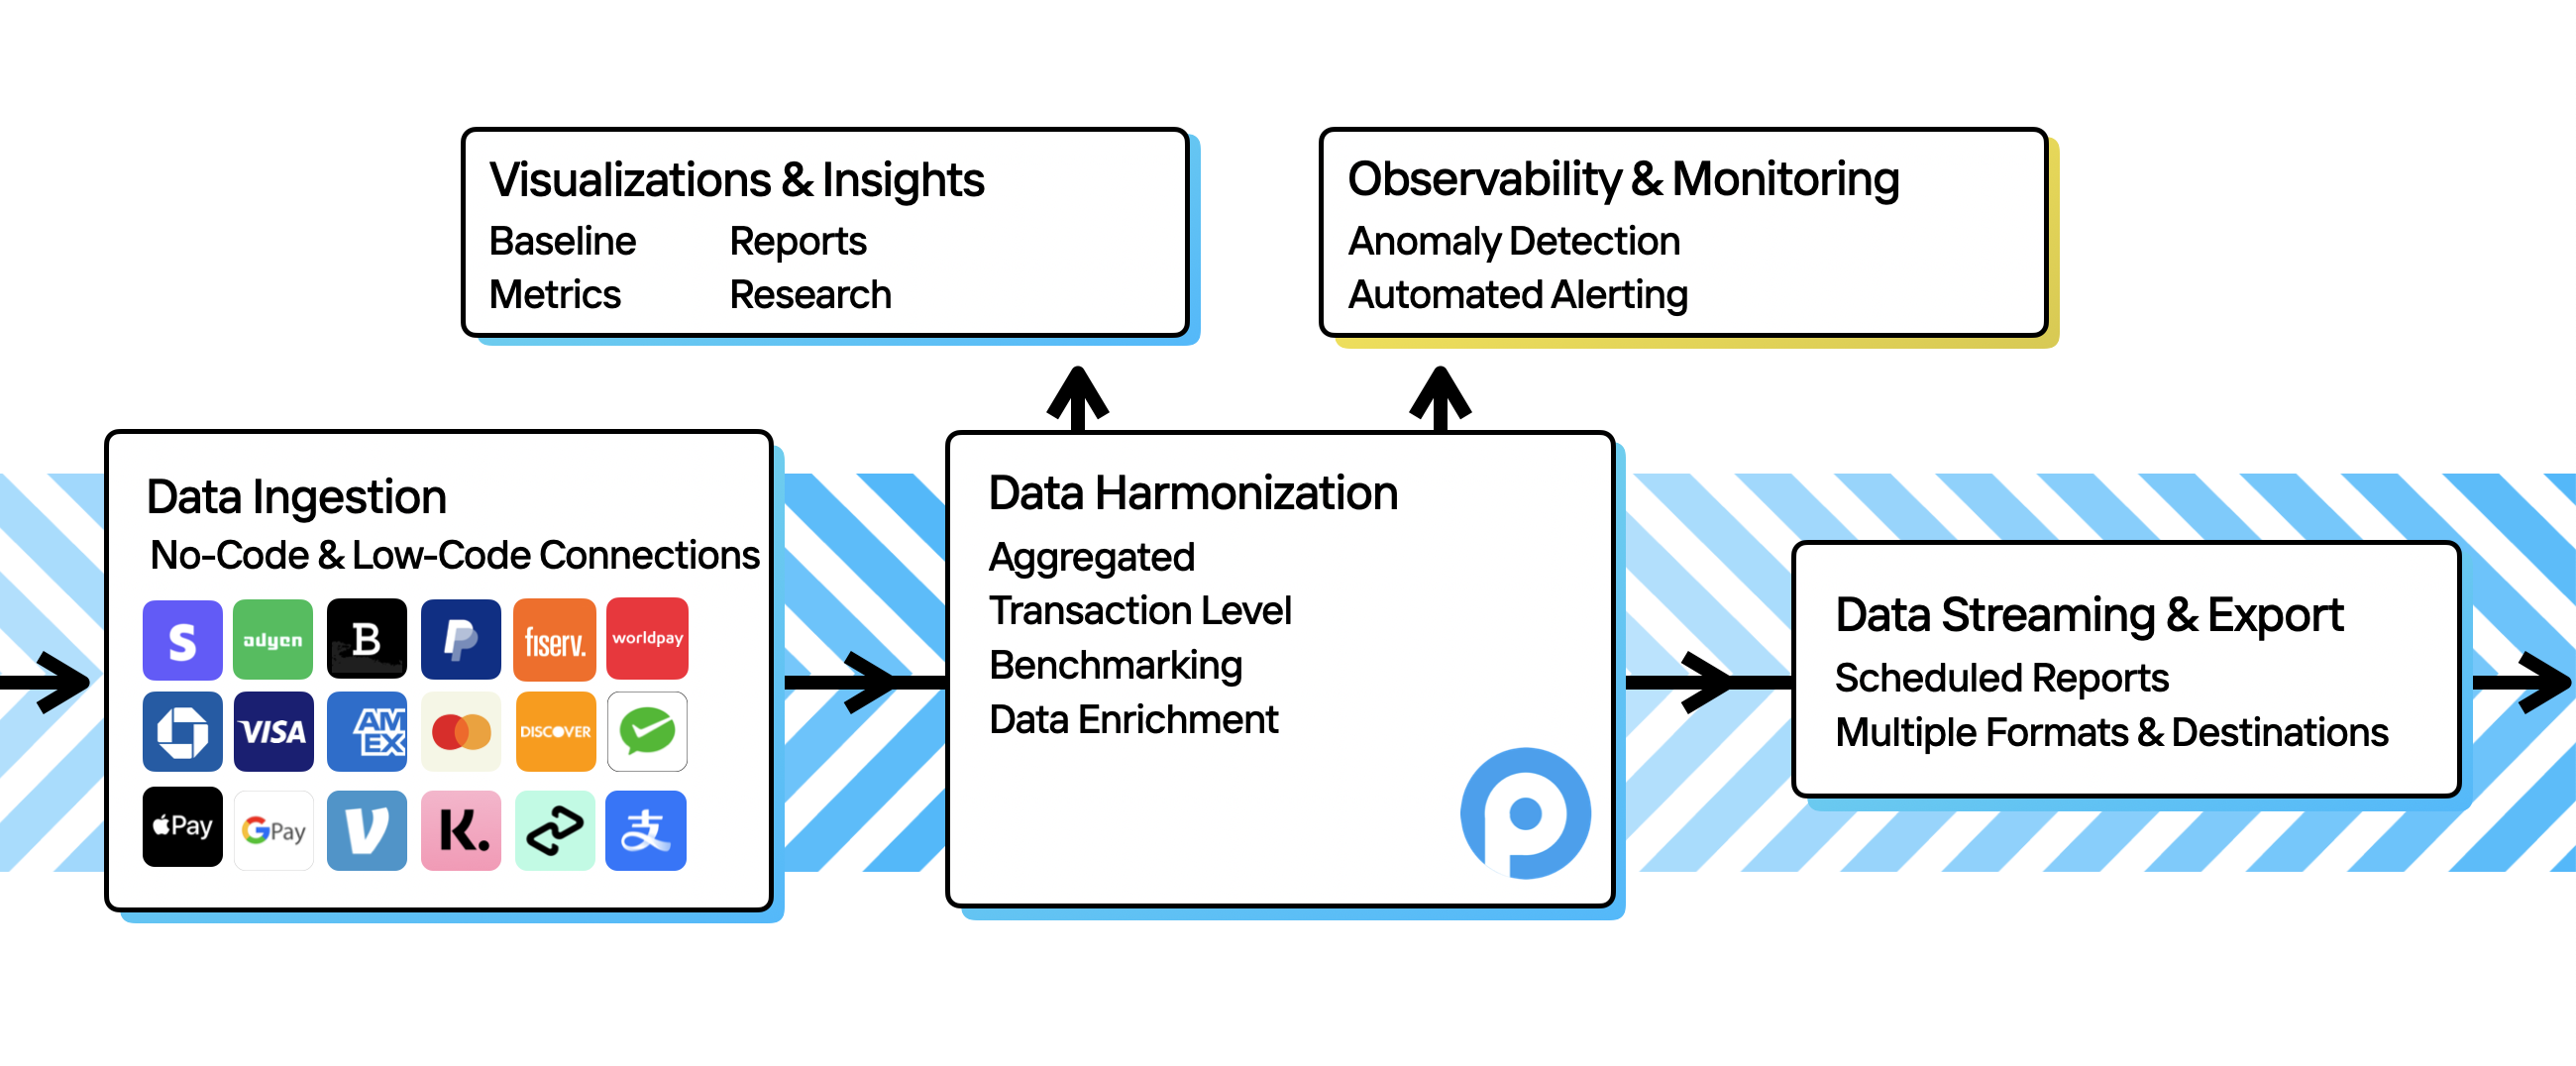 To access [Insights](/insights/getting-started-with-insights), [Benchmarking](/benchmarking/getting-started-with-benchmarking), or [Data Exports](/insights/data-exports) in the Pagos Service Panel, you must first connect your payment processors to your Pagos account; we will then ingest and harmonize your payments data for visualization, monitoring, or export.
## Add a New Data Connection
If you're an **Admin** user in your Pagos organization, you can add as many data connections to your Pagos account as you need. To add a new data connection:
1. Click your settings icon in the top-right corner.
2. Under **Data Connections**, click **Connections**.
3. Click **Add Data Connection** to open the **Add New Data Connection** side panel.
4. Select your **Provider** from the drop-down menu. If you select Adyen, Stripe, Braintree, Chase, PayPal, dLocal, Amex, Fiserv, FirstData, Bank of America, Checkout.com, or Worldpay, ensure you follow the steps outlined in our [Connecting Your Payment Processors to Pagos](/importing-data/connecting-your-payment-processors-to-pagos) guides.
5. Create a **Data Connection Name** for your data connection.
6. Fill out the remaining fields; what fields appear depends on the selected payment provider.
7. Click **ADD Data Connection**.
## Edit a Data Connection
To make changes to an existing data connection:
1. Locate the data connection you want to edit on the **Data Connections** page, then click **...** in the top-right corner.
2. Click **Edit Data Connection** to open the **Edit Data Connection** side panel.
3. Make changes to the existing fields, then click **Update Connection**.
### Adding a Merchant Account ID Alias
You can add aliases to the individual Merchant Account IDs under a data connection. This allows you to assign your own customizable naming structure to your Merchant Account IDs, which we'll then surface to you in data visualizations and filters, such as the **Processor** [filter option](/insights/insights-data-filters#filter-options) in Insights.
To add Merchant Account ID aliases:
1. Locate the data connection you want to edit on the **Data Connections** page, then click **...** in the top-right corner.
2. Click **Edit Data Connection** to open the **Edit Data Connection** side panel.
3. Under **Merchant Account ID Aliases**, click the **Merchant Account ID** drop-down menu, then select the merchant account ID.
4. Type the desired alias in the **Alias** text box, then click **Add Alias**.
5. Repeat steps 3-4 to assign aliases to any other Merchant Account IDs under that data connection.
6. Click **Update Connection**.
## Delete a Data Connection
You can't undo a data connection deletion. When you remove a data connection from your Pagos account, we immediately remove all historical data from that source from each Pagos product you're subscribed to.
To remove a data connection and all associated data completely from your Pagos account:
1. Locate the data connection you want to edit on the **Data Connections** page, then click **...** in the top-right corner.
2. Click **Delete Data Connection**.
3. In the confirmation box, click **Delete**.
To access [Insights](/insights/getting-started-with-insights), [Benchmarking](/benchmarking/getting-started-with-benchmarking), or [Data Exports](/insights/data-exports) in the Pagos Service Panel, you must first connect your payment processors to your Pagos account; we will then ingest and harmonize your payments data for visualization, monitoring, or export.
## Add a New Data Connection
If you're an **Admin** user in your Pagos organization, you can add as many data connections to your Pagos account as you need. To add a new data connection:
1. Click your settings icon in the top-right corner.
2. Under **Data Connections**, click **Connections**.
3. Click **Add Data Connection** to open the **Add New Data Connection** side panel.
4. Select your **Provider** from the drop-down menu. If you select Adyen, Stripe, Braintree, Chase, PayPal, dLocal, Amex, Fiserv, FirstData, Bank of America, Checkout.com, or Worldpay, ensure you follow the steps outlined in our [Connecting Your Payment Processors to Pagos](/importing-data/connecting-your-payment-processors-to-pagos) guides.
5. Create a **Data Connection Name** for your data connection.
6. Fill out the remaining fields; what fields appear depends on the selected payment provider.
7. Click **ADD Data Connection**.
## Edit a Data Connection
To make changes to an existing data connection:
1. Locate the data connection you want to edit on the **Data Connections** page, then click **...** in the top-right corner.
2. Click **Edit Data Connection** to open the **Edit Data Connection** side panel.
3. Make changes to the existing fields, then click **Update Connection**.
### Adding a Merchant Account ID Alias
You can add aliases to the individual Merchant Account IDs under a data connection. This allows you to assign your own customizable naming structure to your Merchant Account IDs, which we'll then surface to you in data visualizations and filters, such as the **Processor** [filter option](/insights/insights-data-filters#filter-options) in Insights.
To add Merchant Account ID aliases:
1. Locate the data connection you want to edit on the **Data Connections** page, then click **...** in the top-right corner.
2. Click **Edit Data Connection** to open the **Edit Data Connection** side panel.
3. Under **Merchant Account ID Aliases**, click the **Merchant Account ID** drop-down menu, then select the merchant account ID.
4. Type the desired alias in the **Alias** text box, then click **Add Alias**.
5. Repeat steps 3-4 to assign aliases to any other Merchant Account IDs under that data connection.
6. Click **Update Connection**.
## Delete a Data Connection
You can't undo a data connection deletion. When you remove a data connection from your Pagos account, we immediately remove all historical data from that source from each Pagos product you're subscribed to.
To remove a data connection and all associated data completely from your Pagos account:
1. Locate the data connection you want to edit on the **Data Connections** page, then click **...** in the top-right corner.
2. Click **Delete Data Connection**.
3. In the confirmation box, click **Delete**.