> ## Documentation Index
> Fetch the complete documentation index at: https://docs.pagos.ai/llms.txt
> Use this file to discover all available pages before exploring further.
# Managing Your Pagos Organization
> Update your Pagos Organization and manage its members
After your business [subscribes to Pagos](https://pagos.ai/pricing), set up a Pagos **Organization** and [connect your payment processors](/importing-data/connecting-your-payment-processors-to-pagos). Your team can then create Pagos accounts, join your Organization, and log into the Service Panel to view your payments data.
This guide reviews how users with the **Admin** role can manage your Organization and its members.
## Managing General Settings
To manage your Organization's general settings:
[Sign in](https://secure.pagos.ai/sign-in) to the Pagos Service Panel.
Click the **settings** icon in the top-right corner of the Pagos Service Panel, then click **Settings** under your Organization's name. This opens a pop-up with your Organization's information.
In the **General** page, click **Update Profile** to add or change your Organization name and logo.
Click **Add domain** to [add a verified domain](#adding-a-verified-domain) to your Organization.
## Adding a Verified Domain
If your business has a verified domain, you can add it to your Pagos Organization. To add a verified domain:
Click the **settings** icon in the top-right corner of the Pagos Service Panel, then click **Settings** under your Organization's name.
In the **Verified domains** section of the **General** page, click **Add domain**.
Enter your domain, then click **Save**.
Enter your email address at that domain, then click **Save**. You'll receive an email to verify the domain for your Pagos Organization.
### User Enrollment with Verified Domains
After you set up a verified domain, turn on Automatic Suggestions to make it easier for users with email addresses on that domain to join your Pagos Organization. To turn this on, click the **...** icon beside your verified domain, then click **Manage**.
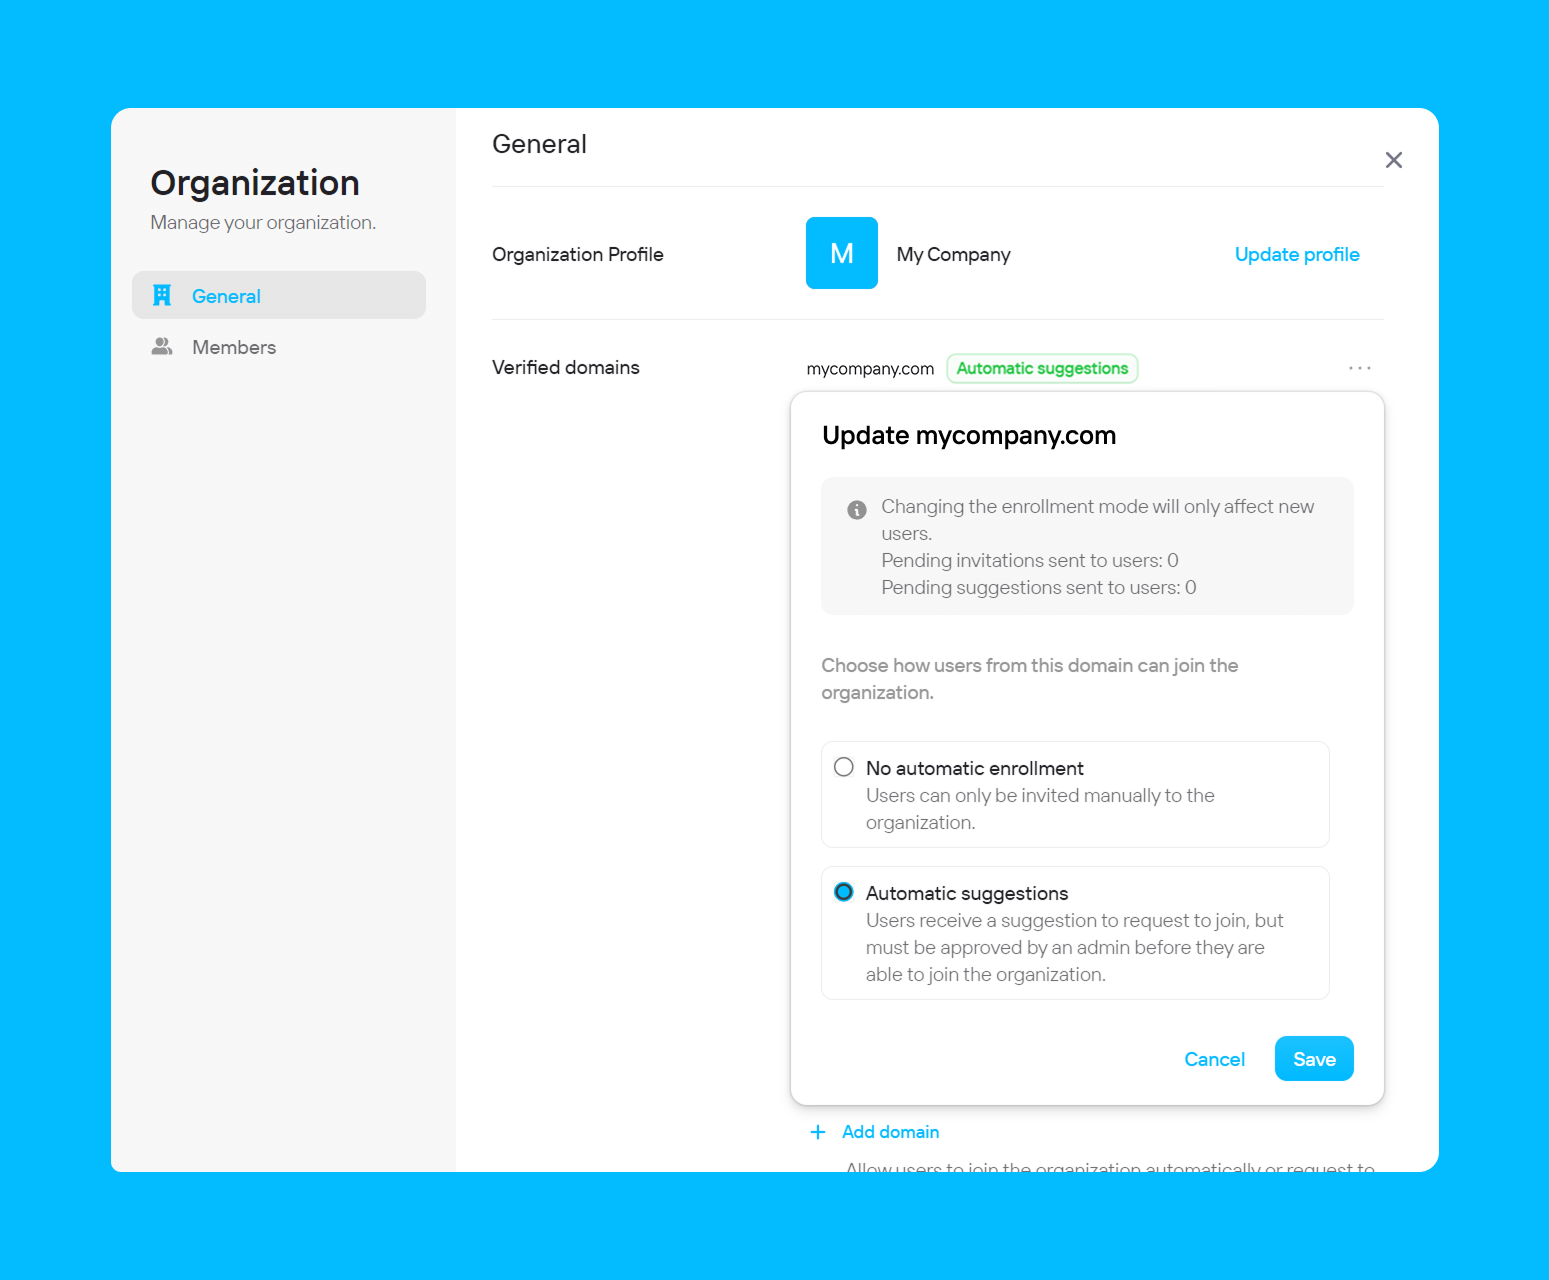 You have two options:
* **No automatic enrollment** - Regardless of the user's email address domain, they can only join your Pagos Organization via an [email invitation](#inviting-new-members).
* **Automatic suggestions** - When a user with an email address on your verified domain manually signs up for a Pagos account, they'll have the option to join your Organization automatically. See our [New User Onboarding Guide](/getting-started/new-user-onboarding-guide#create-an-account-and-join-an-existing-organization) for details on how this looks for a new user on your verified domain. An **Admin** in your organization will [manage requests to join your Organization](#approving-member-requests).
## Managing Organization Members
You can manage which Pagos users have access to your Organization within the **Members** page of your Organization settings. To navigate directly to this page, click **Team** under your company name in the main **settings** menu.
The **Members** tab displays a list of Pagos users in your Organization and their role (Member or Admin). Each user has their own Pagos account with unique login credentials.
You have two options:
* **No automatic enrollment** - Regardless of the user's email address domain, they can only join your Pagos Organization via an [email invitation](#inviting-new-members).
* **Automatic suggestions** - When a user with an email address on your verified domain manually signs up for a Pagos account, they'll have the option to join your Organization automatically. See our [New User Onboarding Guide](/getting-started/new-user-onboarding-guide#create-an-account-and-join-an-existing-organization) for details on how this looks for a new user on your verified domain. An **Admin** in your organization will [manage requests to join your Organization](#approving-member-requests).
## Managing Organization Members
You can manage which Pagos users have access to your Organization within the **Members** page of your Organization settings. To navigate directly to this page, click **Team** under your company name in the main **settings** menu.
The **Members** tab displays a list of Pagos users in your Organization and their role (Member or Admin). Each user has their own Pagos account with unique login credentials.
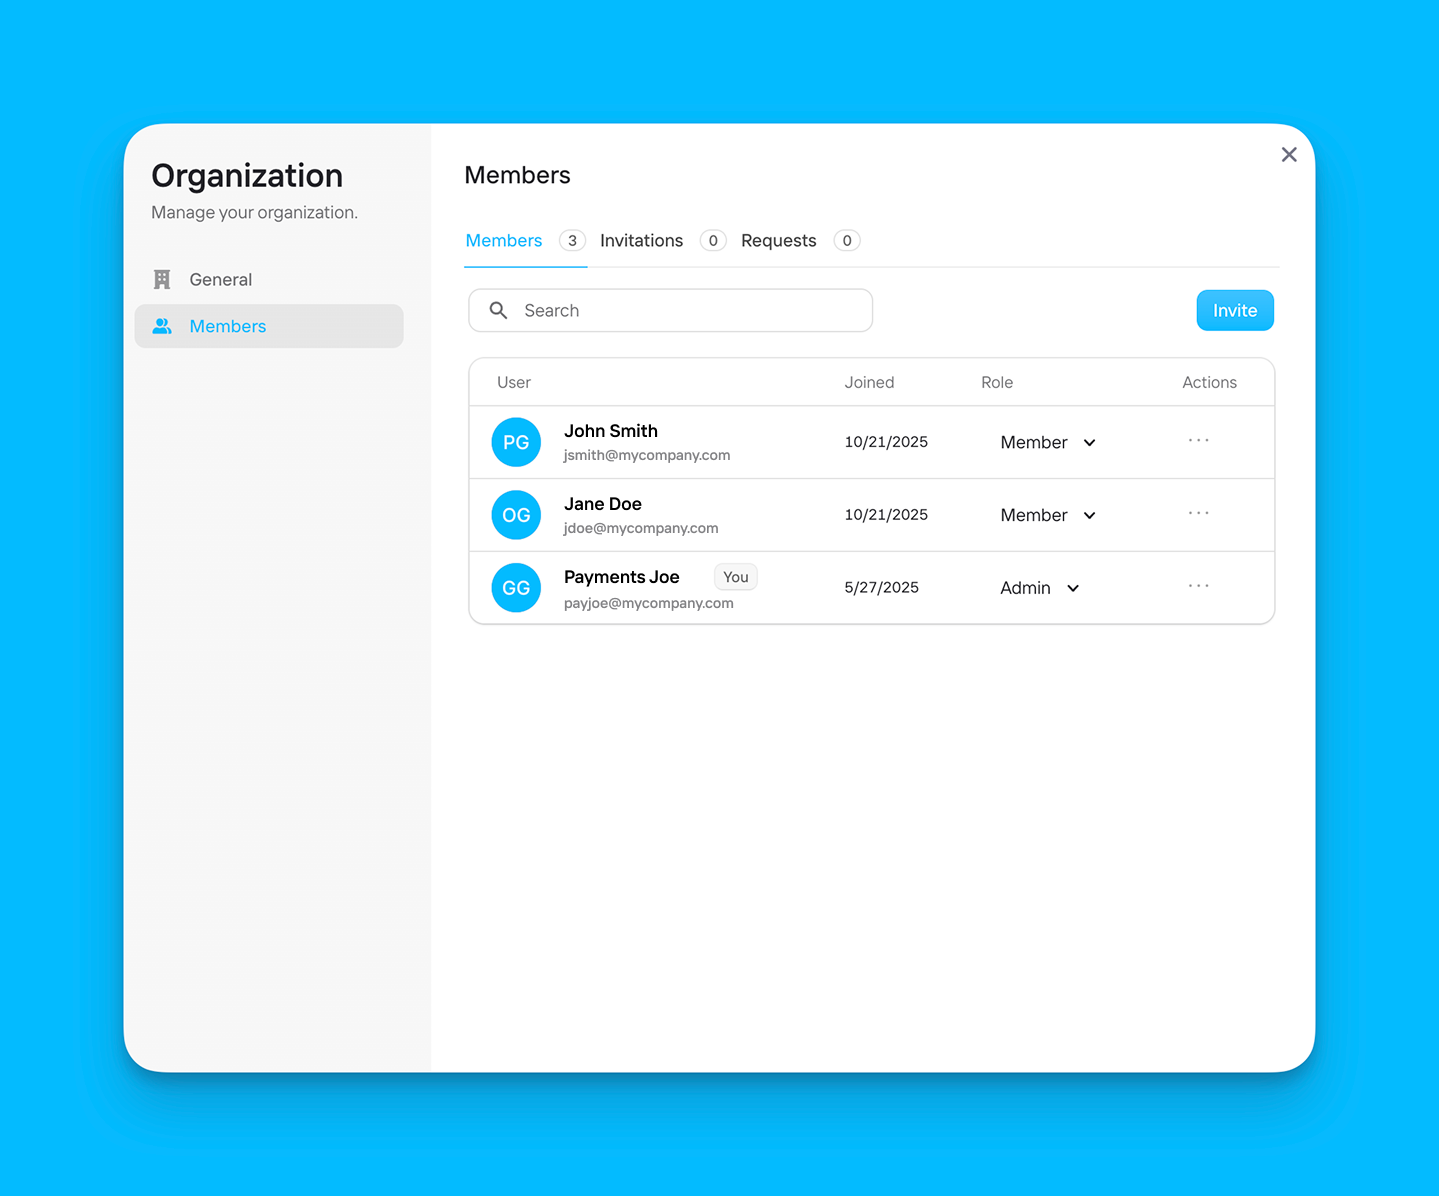 You can change a member's role at any time using the **Role** dropdown menu. To delete a user, click the **...** icon beside their email address, then click **Remove member**.
### Inviting New Members
To invite new users to join the organization:
In the **Members** or **Invitations** tabs of the **Members** page, click **Invite**
You can invite multiple members by adding each email address, separated by spaces or commas.
Use the **Role** drop-down menu to assign a role to the user(s):
* **Members** can access the Pagos Service Panel
* **Admins** can access the Pagos Service Panel, edit data connections, make changes to the Organization's settings, and manage members
We'll then send an email invitation to the user, prompting them to [activate their new Pagos account](/getting-started/new-user-onboarding-guide#accept-an-email-invitation).
### Approving Member Requests
To approve a request to join your Organization from an account with your [verified domain](#user-enrollment-with-verified-domains), navigate to the **Requests** tab of the **Members** Page. Beside the user's name, click **Approve**. Click **Reject** to deny the request.
You can change a member's role at any time using the **Role** dropdown menu. To delete a user, click the **...** icon beside their email address, then click **Remove member**.
### Inviting New Members
To invite new users to join the organization:
In the **Members** or **Invitations** tabs of the **Members** page, click **Invite**
You can invite multiple members by adding each email address, separated by spaces or commas.
Use the **Role** drop-down menu to assign a role to the user(s):
* **Members** can access the Pagos Service Panel
* **Admins** can access the Pagos Service Panel, edit data connections, make changes to the Organization's settings, and manage members
We'll then send an email invitation to the user, prompting them to [activate their new Pagos account](/getting-started/new-user-onboarding-guide#accept-an-email-invitation).
### Approving Member Requests
To approve a request to join your Organization from an account with your [verified domain](#user-enrollment-with-verified-domains), navigate to the **Requests** tab of the **Members** Page. Beside the user's name, click **Approve**. Click **Reject** to deny the request.